Fabrics are some of the most difficult materials to digitalize. So many things come together in the process of producing it, that there are infinite possibilities of how a fabric will look and behave when it is finished. All these components: fiber composition, yarn count, structure, weight, etc, make a fabric look and feel a very specific way.
As the fashion industry moves towards digitalization, being able to correctly represent fabrics digitally has been a challenge. The process is expensive, time consuming and requires specialized equipment. But, regardless of the method or equipment used to do it, it is the fabric that can be the challenge itself.
This post will guide you through choosing the fabrics that will lead to the best digital results. We are experts on fabric digitalization, we have gone through the trouble and challenge of digitizing hundreds of different materials. We’ve put together our learnings in a list of 5 fabric properties to look out for so that the process of making digital materials is as easy as it can be. Just scan your fabric and we’ll do the rest.
5 Fabric properties that will ease digitalization
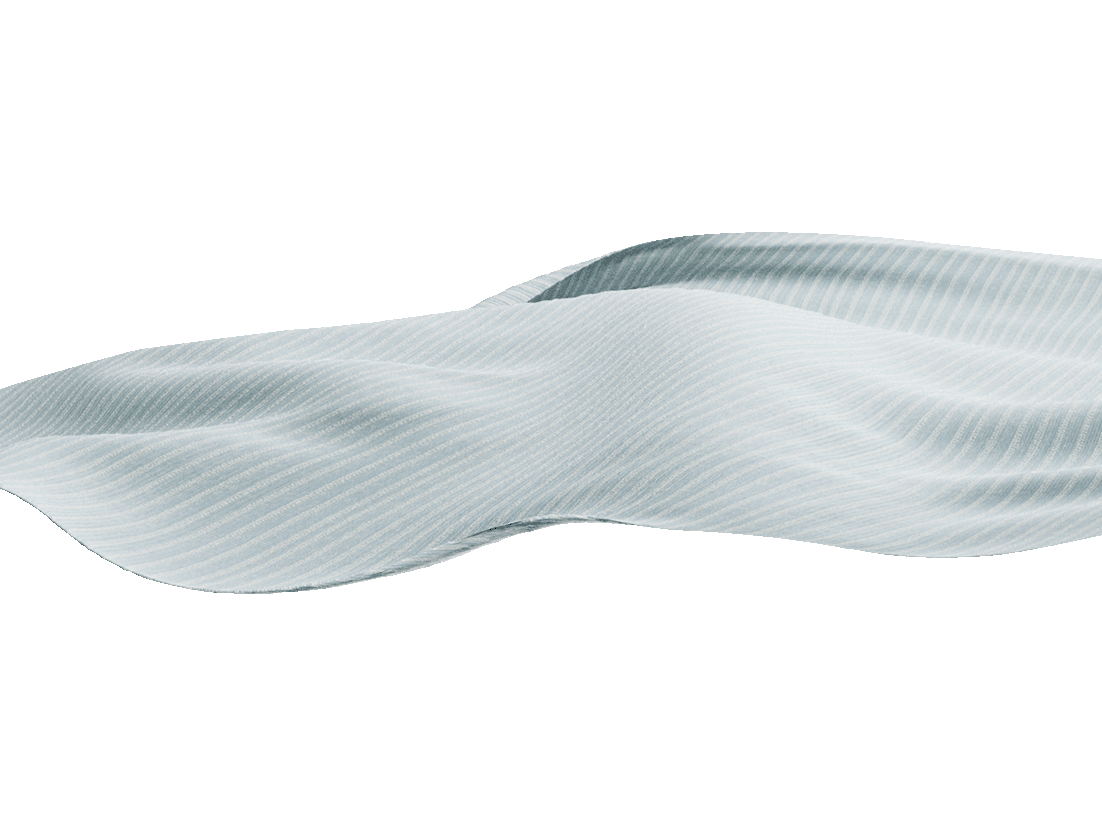
Having a straight alignment will really facilitate the process and improve your results when tiling the texture. Depending on the fabric, this might not be so easy to achieve. Mid to heavyweight fabrics with tight structures should be easy. These types of fabrics are commonly used for garments that need more stability so they are a lot more structured, which will probably give you a proper alignment from the beginning.
For lightweight fabrics on the other hand, like Chiffon, you will probably need to add the extra step of blocking the fabric. This, even if it means a little more effort, will really ease the process of making a seamless texture.
1. 90 Warp Alignment
This post will guide you through choosing the fabrics that will lead to the best digital results. We are experts on fabric digitalization, we have gone through the trouble and challenge of digitizing hundreds of different materials.
We’ve put together our learnings in a list of 5 fabric properties to look out for so that the process of making digital materials is as easy as it can be. Just scan your fabric and we’ll do the rest.

2. Opacity
The less transparent your fabric, the easier it will be to get correct results to represent it digitally. Transparency in a physical fabric is caused by several factors that can be hard to represent in a digital scene.
Fabrics with holes will be the hardest to represent since the texture will have to be done in a way that when the material is rendered, it correctly represents what is a hole vs what is a yarn.
Consider this when choosing your materials, try to scan fabrics where the background won’t show through causing an effect that is not what the fabric looks like. (see example below)
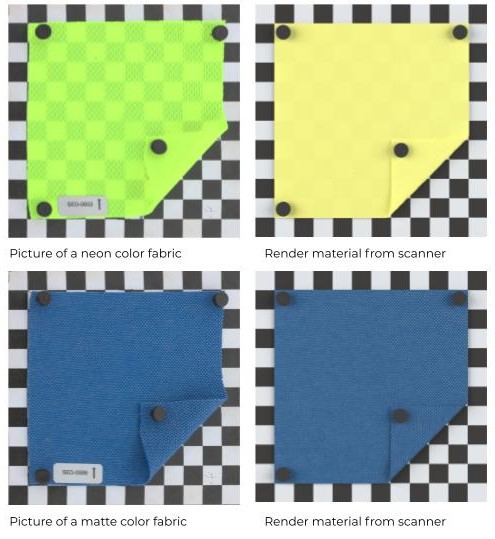
3. Color
Color is one of the most important properties of a fabric, and also one of the most difficult to get consistency throughout processes. Even in the physical world, color represents a huge challenge for producers and designers. Having to correctly translate the physical color of a fabric, to its digital representation, is quite a challenge.
The problem comes when the device you are using to scan your material is just not able to capture the real color of the fabric. This happens with neon, metallic and sometimes white fabrics, whereas the device can’t capture the color as it is, the digital fabric appearance will be very different than the real one. These kinds of materials require more sophisticated texture maps and render engines that can show the true color of the fabric or even its metallic properties.
That is why, the best results will be achieved by fabrics, piece or yarn dyed, with matte colors. There will always be a perceptual difference in color between a physical fabric and its digital counterpart since the environment in which we see them is different. But, if the device we use to capture the material is able to translate the color to a screen, the resulting digital material will be a good representation for the original one. Before submitting your images for digitalization, make sure you are happy with how the image represents the color of your fabric.
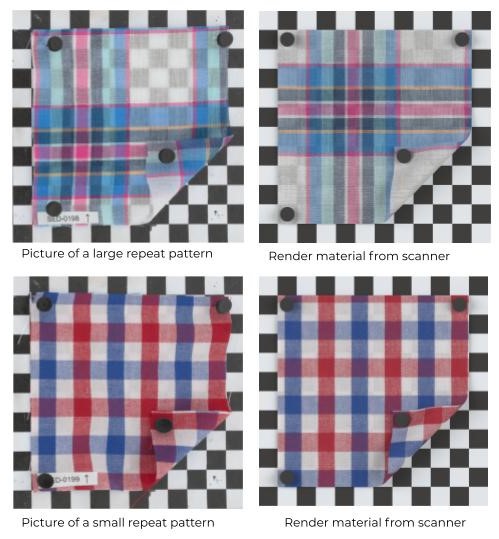
4. Pattern repeat size
Depending on the fabric you are digitizing you might not have a problem regarding pattern repeat. For solid color fabrics you can choose any area of the fabric to scan and get good results (always considering our guidelines for how to scan fabrics).
The problem is when you have yarn dyed or print patterns that are too large to fit the size requested or even be larger than the device can capture. If you plan to digitalize a fabric that has a pattern, make sure it fits the size and that you cut a sample that shows it completely. Not having a full repeat scan will result in having a different pattern design than the one on the original fabric.
5. Hairiness
The problem with hairiness will be the device used to capture the fabric. To get the right illumination you will need to close the flatbed scanner, causing the fabric to be pressed and maybe lose its natural appearance. Most common types of fabrics, like: denims, poplins, jerseys, or other mid weight fabrics usually don’t have a lot of flyouts or hairiness, so they should not represent an issue. Problems regarding hairiness can come from certain finishings, like brushing, or from specific types of fabrics like Velvet or Corduroy where if you press the fabric, the image you get might not properly represent how the fabric naturally looks. We recommend you to do the same as with the color or other properties here, where you make sure the image you get from scanning the fabric is a good representation of the original one.
If you are new to material digitalization, or even if you are a pro, always consider these properties when choosing your materials.
As you become more familiar with what each map will do to appearance in the software you are using, you might be able to edit them and get past the difficulties of digitizing certain types of fabrics.
In the meantime, consider our advice to facilitate the process and get the best results.
Knowing this, request a demo and start using Textura to get your digital materials. Select your fabrics and see for yourself.