")
Textures, or repeating patterns in space, are ubiquitous in the real world, both in natural and man-made materials. By using textures, an artist or a designer like you can digitally represent a wide variety of real world objects, ranging anywhere from very irregular patterns, such as stone or grass, to more structural, including walls or fabrics. Texture maps provide an effective way for realistically representing materials in the digital world.
One of the largest challenges in a digitalization pipeline that produces texture stacks is related to tiling. That is, how can we turn a texture into a tileable texture, which is one that, when spatially concatenated, is impossible to tell at a glance that it has actually been repeated. This process greatly increases the realism of a texture, as it removes any potential artifacts that may arise from spatially repeating the texture.
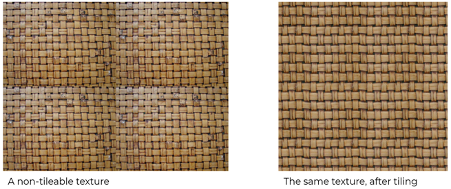 Turning a texture into a tileable texture is really difficult, as one needs to properly account for different factors that many times create trade-offs between tileabilty and the preservation of the content of the texture. Automatically turning an input texture into a tileable one is the goal of tileable texture synthesis algorithms. These receive a raw image and perform a variety of transformations to it, typically creating a completely new one, that looks like the input texture, but it is seamlessly tileable, as shown below.
The success of these algorithms, as well as tiling made manually by artists, greatly depends on the quality of the digitalization. If certain properties are present in them, it is easier to turn them into tileable textures. In this post we will share our experience with tiling textures of fabric materials, which are made up of yarns, making their structure dependent on the position of those yarns. Following the next advice, you will be able to achieve higher quality tileable textures for your amazing designs and renders.
Texture alignment
how to achieve texture alignment
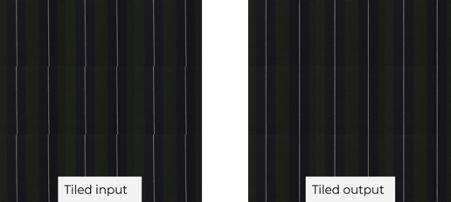
For structured materials, like fabrics, it is important that the images are properly aligned. Yarns should match vertically and horizontally so that the texture is properly tileable. If the image is well-aligned (e.g. it has been carefully placed in the scanner before digitalization), automatic tiling becomes easier.
In the example below, we show what happens when repeating a poorly aligned texture and a well-aligned image, which is the output of an alignment algorithm.
As shown, the image of the right preserves the structure of the original image, but its yarns are well aligned with each other, making it more tileable. Carefully placing the fabrics on your digitalization device will increase the quality of your digital materials.
Size of the image
In order to properly generate a tileable texture, the input image must contain enough information of the material so as to fully reproduce it. This is particularly important for tartans, jacquards or any fabric which contains a large repeating pattern. Scanning an area that does not span the entirety of the pattern at least once, will make it harder to tile, as not enough information is present on the input images.
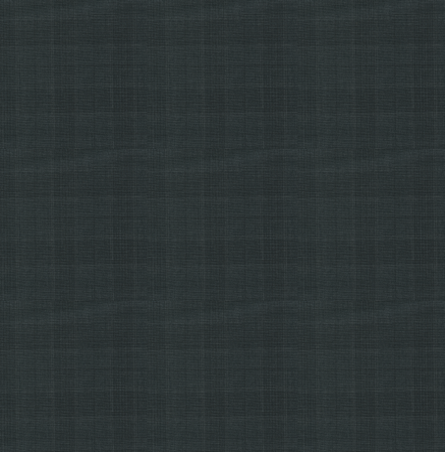
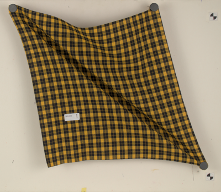 Fabrics have a huge variety of patterns, including heathers, brocades, tartans, houndstooth or herringbone. Capturing enough repetitions of the pattern is key for texture tiling and synthesis, as it helps understand the actual design of the material, as well as providing variations that may enhance their realism when rendered. Below, we show two examples of patterned fabrics of 50×50 cm sizes, with very different pattern sizes. While a 10×10 cm scan of the fabric on the right may be enough to properly tile it, that would not be nearly enough for the fabric on the right. When digitalizing a fabric with a pattern, be mindful of this factor, as larger scanned samples will result in better tilings.
Ironing and Dirt
 The texture, when rendered, will be placed over a surface. As such, it is assumed that the texture represents a flat material.
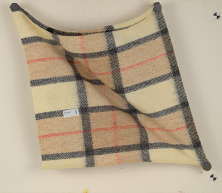
A fabric, when digitalized, should be captured as flat and clean as possible, as wrinkles or dirt may generate unwanted repeating patterns when tiling. Below, we show an image of a repeated tartan fabric, which was captured with a visible horizontal wrinkle.
This is visually very noticeable, and limits the quality of the digitalization.
Recap
If you want to maximize the tileability of your digital materials, a great way to start is by being mindful of the properties of the material you want to digitalize. Carefully placing your fabric on the scanner, cleaning and ironing it, and scanning an appropriate size of it, will largely increase the quality of your textures, helping you create even more amazing renders and designs.